A folder packed with screenshots might look like a gold mine of information. Until someone else has to use it, that is. Suddenly, nobody knows which image comes first, what button to click, or whether the screen shown in an old screenshot still matches the software today. What seemed like a quick way to document a process has become another task that requires someone to explain everything from scratch.
- Why Screenshots Alone Rarely Tell the Whole Story
- Plan the Workflow Before Taking More Screenshots
- Design Screenshots That Explain, Not Just Illustrate
- Put Every Step in an Order People Can Follow
- Turn Your Images Into a Shareable Work Guide
- Keep the Guide Useful After the Software Changes
- A Simple Quality Check Before Sharing
- Make Your Knowledge Easier to Reuse
The problem isn't the screenshots themselves. It's the missing instructions around them. A useful work guide turns isolated images into a sequence of decisions and actions that another person can follow without needing the original creator standing over their shoulder. Whether you're documenting an internal workflow, onboarding a new employee, or explaining a software task to customers, a little structure can make your screenshots significantly more valuable.
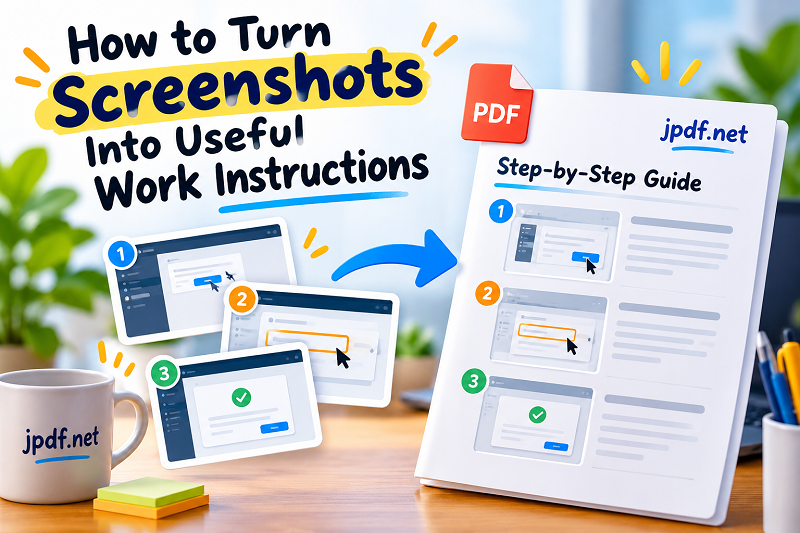
Why Screenshots Alone Rarely Tell the Whole Story
Screenshots capture a moment, not an entire process. They show what appeared on the screen, but they don't automatically explain why an action matters, what happened immediately before it, or what the user should expect next. That's where seemingly obvious instructions start falling apart.
Consider a simple task such as submitting an expense report. You might have screenshots of the expense form, the attachment window, and the final confirmation page. Someone unfamiliar with the system could still struggle to understand which fields are mandatory, which receipts need to be attached, and whether clicking Submit actually completed the process.
Several common mistakes make this problem worse:
- No clear sequence: Images are saved with generic filenames such as Screenshot_001.png, leaving readers to guess the correct order.
- Missing context: A screenshot shows a button without explaining when to use it or what the action will trigger.
- Too much visual clutter: Unnecessary browser tabs, sidebars, notifications, and unrelated interface elements compete for attention.
- Outdated instructions: The software has changed, but the guide still points to a button that no longer exists.
- No definition of success: Readers reach the final step without knowing how to verify that the task was completed correctly.
A good guide eliminates these uncertainties before they turn into repeated questions, avoidable mistakes, or unnecessary support requests.
Plan the Workflow Before Taking More Screenshots
Before opening your screen capture tool, define the job the guide is supposed to accomplish. Start with one specific outcome, such as creating a customer record, exporting a report, or submitting a purchase request. If the process has several unrelated goals, split it into separate guides rather than forcing everything into one oversized document.
Next, walk through the task as if you were doing it for the first time. Identify the steps where someone must make a decision, enter information, choose an option, or confirm a result. Those are usually the moments worth documenting. You don't need a screenshot for every mouse movement; you need enough visual evidence to make important actions clear.
A practical planning checklist looks like this:
- Define the starting point. Tell readers what they need before beginning, including account access, required files, or permissions.
- Break the task into meaningful stages. Group related actions together so the guide follows the way people actually work.
- Identify likely points of confusion. Capture screens where a wrong choice could cause an error or where the interface isn't self-explanatory.
- Decide what success looks like. Determine the confirmation message, saved record, generated file, or other result that proves the task is complete.
This preparation saves time later. More importantly, it prevents you from producing a beautifully organized collection of images that still leaves readers asking, "Okay, but what do I do now?"
Design Screenshots That Explain, Not Just Illustrate
A useful screenshot should direct attention to the information that matters. Before capturing an image, close irrelevant windows, remove unnecessary interface clutter, and position the relevant control where it's easy to see. Keep the screen at a readable zoom level instead of squeezing the entire application into one tiny image.
Annotations can help, but restraint matters. A numbered marker, subtle highlight, or short arrow can point to a specific control without overwhelming the interface. If every button is circled and every section is covered in bright colors, readers have to work harder to distinguish the important detail from the decoration.
Pair each image with a short explanation that answers three questions: What should the reader do? Where should they do it? What should happen afterward? For example, "Select Export in the upper-right corner, choose CSV, and confirm that the download appears in your browser." This gives readers an action, a location, and a result to verify.
Also, capture the interface at a consistent scale whenever possible. Switching randomly between full-screen images and tightly cropped details can make a guide feel disjointed. Use a close-up only when the extra detail genuinely improves comprehension, and make sure readers can still understand where that detail fits into the larger workflow.
Privacy deserves attention at this stage, too. Screenshots may expose customer names, email addresses, account numbers, internal URLs, or other confidential information. Replace real data with safe examples or redact sensitive details before sharing the guide. Cropping an image is not enough if confidential information remains visible elsewhere in the document.
Put Every Step in an Order People Can Follow
Once you have the images, organize them around the user's journey rather than the order in which the files happened to be saved. A folder's timestamps aren't a reliable substitute for a logical sequence, especially when screenshots are retaken or copied between devices.
Give each step a clear heading that describes the action or milestone. "Open the Billing Settings page" is more useful than "Step 3." Then place the relevant screenshot directly beside or below the instruction so readers don't have to scroll back and forth to connect the explanation with the image.
For longer processes, divide the guide into stages such as preparation, execution, and verification. Include warnings near the actions they affect instead of burying them in a general note at the beginning. If a particular step applies only to certain users, explain the condition before asking readers to continue.
Don't skip the verification stage. A workflow that ends with "Click Save" assumes the software behaved as expected. A stronger guide tells readers to look for a confirmation message, reopen the saved record, or check the generated output. When an operation can fail silently, explain what to do if the expected result doesn't appear.
The goal is to make the document navigable even when someone is interrupted halfway through. Clear headings, consistent terminology, and visible checkpoints let readers resume the process without starting over or relying on memory.
Turn Your Images Into a Shareable Work Guide
When the instructions are ready, choose a format that fits how people will use them. A collection of image files can work for a quick internal exchange, but it becomes awkward when recipients need to open files individually, print the instructions, or keep everything together for future reference.
A single PDF is often a practical option for distributing a fixed version of a work guide. It keeps the pages in a predictable sequence and makes the document easier to share through email, internal knowledge bases, or team collaboration tools. If your screenshots are already saved as PNG files, you can convert png file to pdf to assemble them into a document, then add or arrange the accompanying instructions using your preferred document editor.
Before publishing, review the finished guide from the reader's perspective. Check that images appear in the intended order, text remains readable at normal viewing size, annotations aren't clipped, and page breaks don't separate an instruction from its screenshot. If the document will be printed, check margins and contrast as well. A guide that looks sharp on a large monitor can become difficult to read on paper.
For a more polished result, include a title, a short purpose statement, the intended audience, and any prerequisites. Add a revision date or version identifier when the instructions depend on a particular software release. These small details help readers determine whether they're using the correct document before they begin.
Remember that converting images into a PDF doesn't automatically create an accessible or searchable guide. Add meaningful text, use descriptive headings, and consider accessibility requirements when preparing the final document. If users need to copy text from screenshots, OCR or a text-based source may be necessary.
Keep the Guide Useful After the Software Changes
A work guide isn't finished forever just because the PDF has been exported. Applications change, permissions evolve, policies get updated, and familiar buttons move to unfamiliar places. Without a maintenance plan, even a well-written document can quietly become a source of mistakes.
Assign an owner to each important guide and establish a simple review trigger. You might revisit the document after a major software update, when a process changes, or when users repeatedly report the same point of confusion. You don't need to schedule a lengthy review every week; you need a reliable way to catch changes before they make the instructions misleading.
When updating a guide, check the entire workflow rather than replacing only the screenshot that looks different. A changed interface may affect the sequence of actions, the available options, or the final confirmation. Test the instructions from beginning to end whenever practical, and remove outdated copies from shared folders so people don't accidentally follow an obsolete version.
Feedback can make maintenance much more effective. Ask readers which step required extra help, where they hesitated, and whether the final result matched their expectations. Those answers reveal gaps that may not be obvious to the person who created the guide.
A Simple Quality Check Before Sharing
Before distributing your work instructions, run through a final review:
The guide describes one clear task or outcome.
Prerequisites and access requirements are stated.
Screenshots follow the actual workflow in the correct order.
Each important action has a concise explanation.
Images are readable, relevant, and free of exposed sensitive information.
Readers can verify that the task has been completed successfully.
The final document displays correctly on screen and, if necessary, on paper.
An owner or update process is identified for future changes.
If a colleague can complete the task using the guide without asking you to explain the missing steps, you're on the right track. If they still need you to interpret every other screenshot, treat that as useful feedback rather than a reason to add more images indiscriminately.
Make Your Knowledge Easier to Reuse
The real value of a visual work guide isn't the number of screenshots it contains. It's how effectively those images help someone perform a task accurately, independently, and consistently. A handful of well-chosen screenshots with clear instructions can outperform dozens of unorganized captures.
Start with one process that generates frequent questions or depends heavily on a particular employee's knowledge. Document the important actions, explain the expected results, and test the guide with someone who hasn't performed the task before. Once that workflow becomes repeatable, apply the same approach to the next one.
When your instructions are clear, properly organized, and easy to maintain, screenshots stop being digital clutter and start becoming reusable workplace knowledge. That's a far better return on the few minutes it takes to capture a screen.